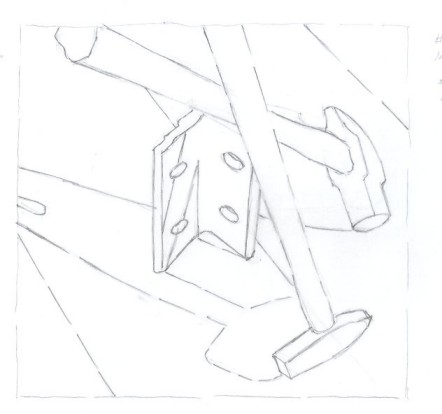
| In step 6, I've drawn in a lot more shapes. Don't be intimidated by this. Take your time, look carefully where the lines and shapes are in relation to the other objects, and to the edge ot the sketch. For instance, along the top of the sketch, see where the handle of the straight peen hammer is near the upper left corner. Notice how the combined shadow of the cross peen hammer and piece of metal goes near the middle of the left edge of the sketch. Place each object slowly and carefully in your sketch this way. |
|
|
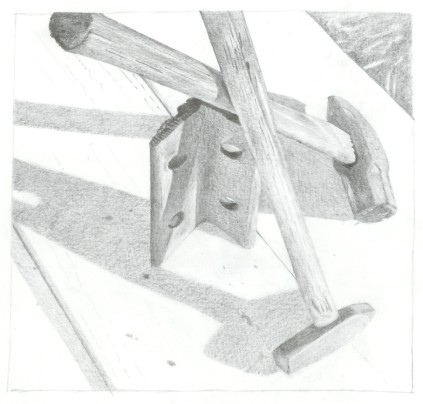
| Here's my final sketch, with shading. Use the side of your pencil lead, pay careful attention to how much pressure you're using, and how consistent you are. I used a somewhat circular motion as often as possible. I often had to go over a pencil line with an eraser just before shading it in, making it so light , that I could barely see it. Remember, the goal here is to show these objects without resorting to lines to define the shapes. As you concentrate on one area, such as a two inch section of a handle, you'll be surprised at how much more detail you see than when you were looking at the picture as a whole. Notice how along the one long corner of the lower hammer head, the corner is so light, that I just left it white. Notice how where the handle goes into the other hammer head, there's a very dark opening. Using the side of your pencil to shade with will probably keep the point sharp, but if not, use a cheap made in China stone knife sharpener to sharpen the tip. This can be used to LIGHTLY make lines in wood grain, and other detail.
|
|