For instance, if the sketch I made was the same size as the print, I could look at an object in the picture, and say to myself, "That's about an inch from the edge" then do that same in my sketch. By making the sketch a dissimilar size, I'm challenged to look at relative sizes and measurements. For instance, I would have to say:"That object intersects the edge of the picture a little more than halfway across..." This is why you should make your sketch a dissimilar size from your print.
To the left are the first two steps. My print and sketch are actually much larger than this, these are reduced in size so that the pictures and page load faster for dial up viewers.
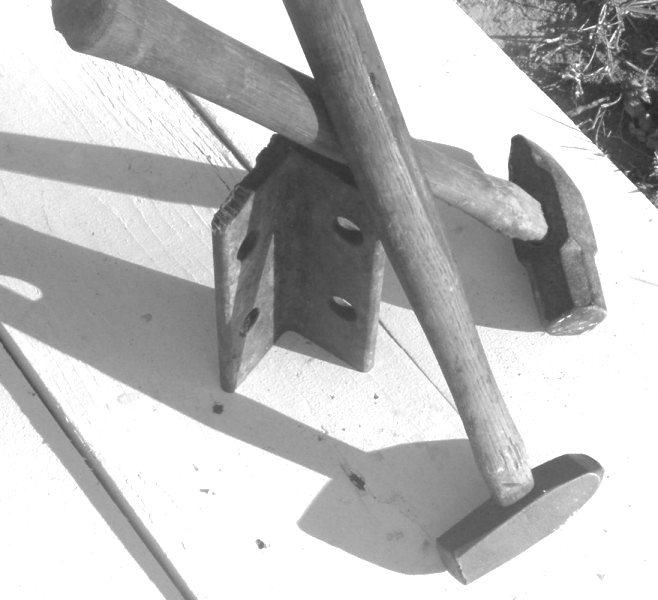
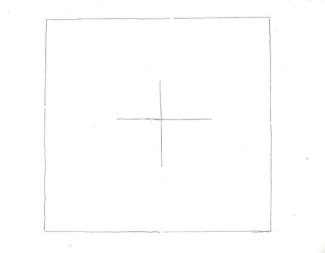
The first thing I did was to look at the picture, and determine if it was a square, a rectangle, or just what the proportions were. It appears to be just a little wider than tall. Next, I determined where the center of the picture was, and made a mark on my paper.
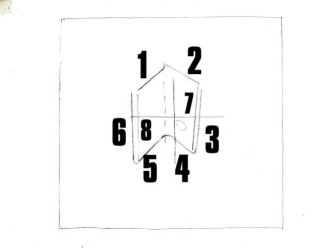
In the second step at the left, I have made a dotted line where the corner of the metal is, and the lower right hole in the metal. REMEMBER, light pencil lines! These in the lesson are much darker , so that they show up in the scanning and page making process. Yours should be only dark enough for you to know where they are. In the third step at the left, I made the shape of the metal. You don't have the follow the same sequence, this is what seemed easiest to me. I did the inner two vertical lines ( 7,8 ) last. Notice how very rounded the inside corner of the metal is ( between 4 & 5 ) Also, notice how the two vertical edges are not parallel straight, they are kind of V shaped. This is a very good example of perspective in a picture. Notice how where line 1 meets line 2, it has this little curve upward. This has to do with how the metal was cut, but these details add realism to your sketch. Take your time, get it right, this is no race. I did my sketch in several two hour sessions, maybe more, I wasn't counting.
For the rest of this lesson, go to page 2