|
|
|
Make a vector file with the trace feature
|
|
|
|
|
|
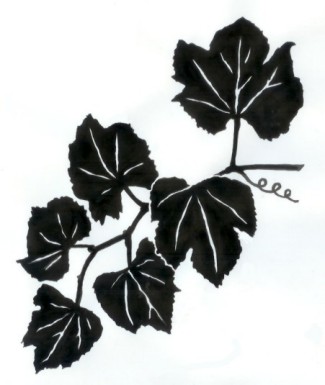
First, you'll need to have a black and white rendering of your vine picture. You make this with a light table, or with a window pane during the day (or lighter on the other side of the glass). You take a piece of the higher quality copy paper, and lay it on top of your vine sketch. Tape them both to the glass or plastic. Use the jelly roll pen mentioned in the required supplies to trace over the sketch. Use a larger felt marker, or whatever you can to fill in the large black areas. Remove the bottom sketch before you start filling in the large areas. I used a brush and india ink. The idea here, and this is very important, is to have the edges of your black be very crisp against the white paper.
The lower cost paper will bleed on the edges of the black, so will a regular extra fime felt marker. The software will see the fuzzy edges and make lots of extra nodes, or rough lines.
To refresh your memory of what a vector file is, go read lesson1_A again. Having a plotter draw or cut out your work is one of the funnest art projects you can do, but you'll need it turned into a vector first.
|
|
|
 |
http://Edge.twoedgegraphics.com/img/images1/ |
|
|
|
Here you can see my black and white rendering of the vine sketch. Notice how solid the edges are, not sketchy. Notice too how I left white spaces where leaves and branches touched. Because of the way the trace feature adds a little width to things, you're better off making the veins a little wider at this stage. The Trace feature will probably fill them in a little. This B&W rendering is reduced in size for this web page, it is in fact the same size as the original color sketch.
|
|
|
|
 |
|
|
|
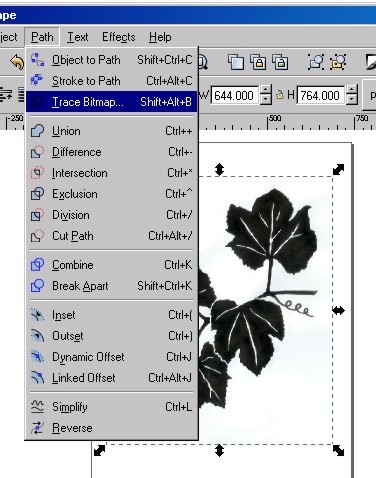
Next, scan your B&W image into your computer, and clean up any specks or smudges in Gimp. We talked about this in class, and in Lesson 1A at this site.. After clean up, save the file where you can remember it's location, making a folder for this is a good idea.
Next, open Inscape. Go to file>import, and import the raster B&W image. Remember to select it, when you do, those little black two ended arrows will be around the edge of it. In this first screen capture, you can see the scroll down list under "path" on the top. So click path>trace bitmap. A box will appear on your screen.
|
|
|
|
 |
|
|
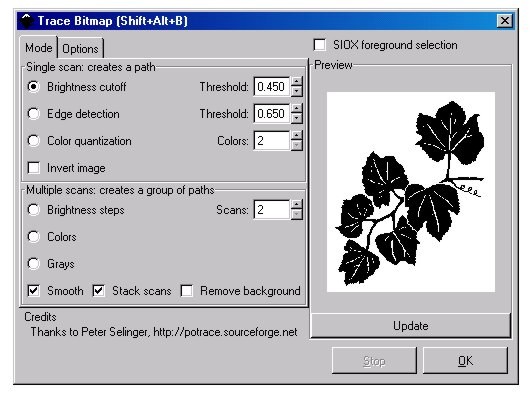
| You'll see that the box has two tabs, one is mode, the other options. Under the first one, you'll see a number of choices, make them like I have mine in this capture. You'll probably only have to change "colors" and "scans". I don't think you'll have to make any choices under the second tab, but experimenting around with this is a good idea, after this lesson is over. When you have the choices made, click OK.
You now have a vector image right above your raster image. Go to Vector page 2 for more instruction.
|
|
|
|
|
|
|
|
|
|
|
|
|
|
|
|